|
|
Post by jdl51 on Mar 15, 2016 18:37:31 GMT
I've been working on a fix for all the rusted, corroded V logo bits and pieces. I'm very close to getting an almost exact reproduction V logo aluminium disc replacement for QRs, bolts and nuts. There are three sizes we're dealing with here, 9/16, 7/16 and 3/8 anodized aluminium discs. It appears the originals were made from what they call bright dip anodized aluminium, and not the satin anodized that is readily available. What I've done is purchased some red anodized aluminium sheeting, had a graphics design shop do the artwork and then sent to a laser marking facility that lasers the logo onto the anodized aluminium. It's not quite like the original because the original is some kind of stamped paint, I've been told, on top of the anodized discs. I purchased a little punching device that has the various sizes and once I got the newly lasered plates back, simply put them in the punch base, line up the logo in the proper hole, and hit the steel punch out with a rubber mallet. Removing the old discs is simply a matter of taking a heat gun, heating up the bolt, nut or QR piece until the disc is loosened or pops off. QRs are the easiest because you can tap slightly on the inside to help the process. The nuts are this way as well. Bolts are more difficult because you have to get something sharp in between the bolt edge and the disc to get it off. Using a torch also can be used but the heat gun method is more gentle. Concurrent to doing all that, I also took a few pieces to my local plating shop and had them rechrome a few items. Anyway, I've taken pics of the whole process and hopefully and can get them all posted here. I'll add another post with more pics.    |
|
|
|
Post by jdl51 on Mar 15, 2016 18:38:10 GMT
|
|
|
|
Post by jdl51 on Mar 15, 2016 18:38:44 GMT
|
|
|
|
Post by jdl51 on Mar 15, 2016 18:49:35 GMT
 Old versus new. The boys at the graphic shop will be putting a little more separation in between the Vs. There's a bit of bleed that hopefully will be compensated for. The little red line is not as pronounced on the bigger versions and almost non existent in the smaller versions as you can see with the pic of the plate with all the various sizes, but I believe this will be about as close as it gets. The laser also doesn't quite get out all the red but it's not bad. It feels smooth. The laser basically bleaches out the red anodizing leaving it still anodized but looking like plain aluminium. The gloss isn't quite the same either and I was going to clear coat a couple and see how that works out. It's a UV clear coat and they claim it will stick to metal. |
|
|
|
Post by bicyclebits on Mar 15, 2016 19:27:11 GMT
jdl51-
What a clever method for restoring the logos. You may well have to go into production with this!
|
|
|
|
Post by jdl51 on Mar 15, 2016 20:29:04 GMT
jdl51- What a clever method for restoring the logos. You may well have to go into production with this! Basically I am into production. The plate in the picture with all three sizes was just a test. There's four 6x6 sheets. They're going to make 36 of the large ones on one, 36 of the medium ones on another and maybe 90 or more of the small ones for the bolts and nuts on the remaining two. The medium ones are only used for some of the skewers. I don't know why they made two different sized QRs, as far as the discs go, probably something to do with the supplier. I am only going to end up using a few. Maybe I could send some to whomever might want them. I'm guessing they could be sent in an envelope, without a canceling machine ripping them open. They're 25 gauge aluminium versus 22 gauge for the originals, so they're thinner but you really can't tell the difference. This process can be used for the Lambert branded parts as well. The only issue there is that there's a red L inside the white L. The artwork is easier. I guess, if you wanted, you could make two tiny red lines by hand using a ruler somehow. |
|
Jem
Viscount
 ?
?
Posts: 3,389 
|
Post by Jem on Mar 16, 2016 7:53:53 GMT
Wow, what ingenuity! Great stuff.
If the forum had a Medal for Services to Viscount/Lambert refurbishment, then you've been awarded it!
You do know that as 'originator' of the process for these ,you get to have it named after you...so, forever more when a Viscount owner wants to refurb their V logos , they would say ..."well, I'm gonna jdl51 all the V logos"
|
|
|
|
Post by lewisg on Mar 28, 2016 11:34:27 GMT
Good work!
|
|
robt
Viscount
Posts: 558
|
Post by robt on Apr 16, 2016 19:25:43 GMT
Jim's been doing some more work on the v-logos, but is having trouble posting photos onto the forum. He's now using powder coated colour on the sheet aluminium and creating the "V"s by laser etching. True dedication. He sent me these pictures as examples of what he's now able to produce from a flat sheet, alongside his curved, presumably original, logo'd pedal caps (I don't think that I have ever seen 3 'V' pedal caps together before!): 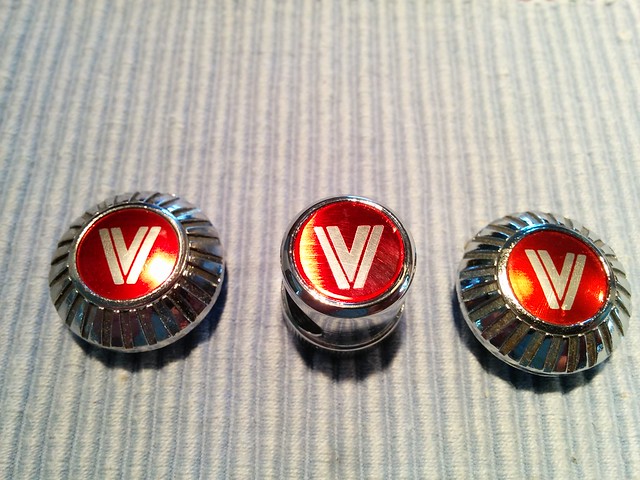 Viscount logos final Viscount logos final by RMT@261, on Flickr 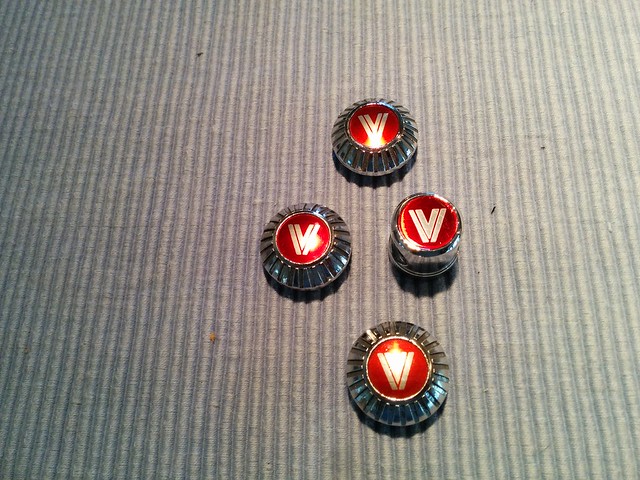 Viscount logo 3 Viscount logo 3 by RMT@261, on Flickr 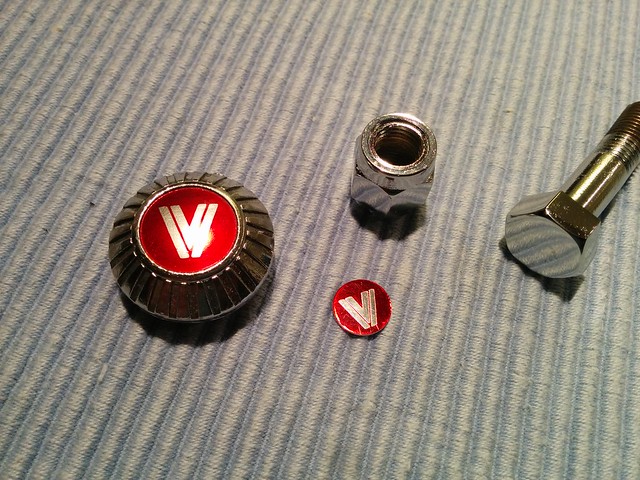 Viscount logo 2 Viscount logo 2 by RMT@261, on Flickr Jim's willing to post few over to share out at DFR4, but modestly suggests that there might not be much demand. Would anyone be interested? Jim also sent a picture of the Aerospace Pro he has owned since 1977 and restored last year. 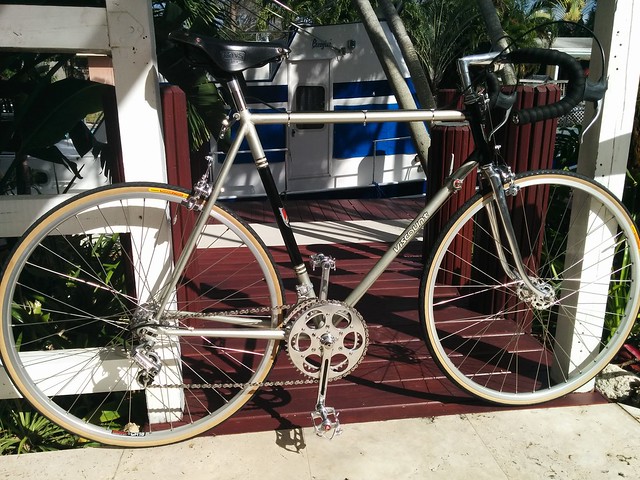 Viscount Resto 1 Viscount Resto 1 by RMT@261, on Flickr I think we have a true craftsman among us. |
|
|
|
Post by kickstandman on Apr 17, 2016 3:35:05 GMT
Yes, it's amazing. That bike might look better now.
|
|
robt
Viscount
Posts: 558
|
Post by robt on May 12, 2016 22:05:29 GMT
jdl51 (Jim) has sent me some samples, which he modestly offered so that we can inspect at DFR4 'to see if anyone is interested'. They really are a work of art. The picture below doesn't do them justice, and is much kinder to my old seatpost nut than it deserves. 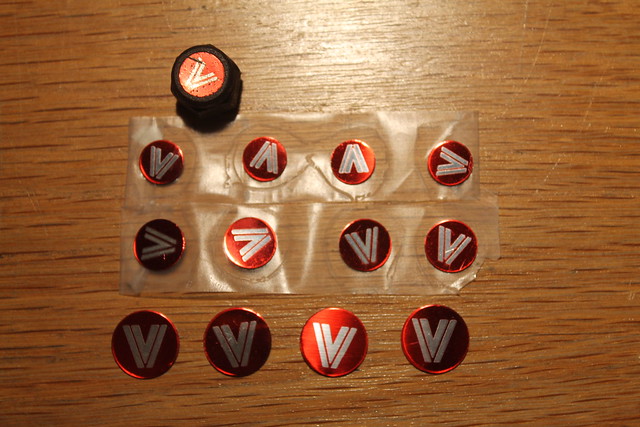 IMG_4374 IMG_4374 by RMT@261, on Flickr I have four of each size, as shown. If any UK member has a burning need for one or two for a current project (Scott's pedal caps?), I'm happy to receive requests to share them out before DFR4. Otherwise, stake your claims by 8th July! |
|
|
|
Post by bicyclebits on May 13, 2016 3:24:14 GMT
Jim,
That is lovely work and quite beyond what the average enthusiast can come up with.
|
|
Jem
Viscount
?
Posts: 3,389
|
Post by Jem on May 13, 2016 17:28:49 GMT
That deserves a round of applause. Great work!
|
|
|
|
Post by triitout on May 13, 2016 18:37:40 GMT
Jim,excellent work. Time to see where I could use replacements and PM you.
|
|
|
|
Post by jdl51 on May 14, 2016 5:02:54 GMT
Jim,excellent work. Time to see where I could use replacements and PM you. Anytime you're ready. If you're in the UK, check out the ones I sent to Rob at the DFR4, if you get the chance. There is a caveat. I can't guarantee how long these will last as far as corrosion because they're not anodized like the originals. Not being able to come up with an anodized solution was a big disappointment. I've been trying an acid wash, Alumiprep, and clear coat immediately after drying, but then you have to handle them with a bit of care when installing them. The ones I sent over didn't have that treatment. I used to paint boats and aluminium was always an issue, eventually. I guess the main thing is there is now an alternative to just looking at those singular Viscount pieces, most having seen better days. Jim. |
|