|
|
Post by schrauber on Apr 21, 2018 21:31:37 GMT
Progressing from my introduction in March, I'll start a thread here for my project. Photobucket corrected linkI've added a number of photos from the work and progress, it looks like this bike project has it's share of challenges. Starting with the frame I Ebayed from UK: I found the frame number (1545185) under realy poorly done powder coating, which looks like a refinish job. Even a screwhead (threaded hole to be seen under the number)was under the coating?? Weird also is that the rear drop outs are quite different, one with a intergrated eyelet and axel adjuster screw hole. I drilled and tapped the other one to match. The frame as a tube brazed into the rear brake mount, a nice and sensible detail. After dealing with rust, the priming and filling began. Then I added bosses for the bottle cage, as I realy hate those clamps. Also threaded the mudguard eyelets. Paint will be a spray can creation, which I've been lucky with on other bikes. More later & can't be worse than what I removed. For all of the praise these frames/bikes get for their quality, there's a lot of crudness mixed in. To the parts Also all Ebayed, except the handfull of parts I still have from my long gone '76 Sport. Weinmann rims with those "bumps" for the spoke nipples, like old motor bike rims, Lambert Hubs with center punch marks to hold the bearing in. Kinda brutal. In an assorted Lambert box, I scored the twin bolt seat post and handlebar stem in good condtion. Interesting that the Lambert front hub has a much smoother shape than the viscount front hub. So much so that I may need to make a tool to fit it when doing the bearings. All these will get striped down and restored, respoked etc. I great find was a set of new Olimpic Super brake levers, as my bike came with new way back. And back then I was impressed that the hood shape was so comfortable compared to anything I'd seen. I haven't seen Olimpics on any US/UK Viscount, but several from down under. (The viscount hubs do look quite similar to Olimpic HF hubs from the time, just without the s. bearings) My current project in project is a new chainwheel, although I have a good Lambert one, I'm having a go at machining one with 48T. Well see how that goes too. Scored Titlist changers and the bunny eared gear levers, so the parts bucket is almost full. Looks like I'm going away from my original idea of using some of the 600 AX parts. Well that's a good start, more soon. |
|
|
|
Post by schrauber on Apr 22, 2018 19:44:02 GMT
Well the link was well to the same page, should get my trainer wheels back on. try this one: Time for a Viscount |
|
Jem
Viscount
 ?
?
Posts: 3,388 
|
Post by Jem on Apr 22, 2018 19:50:36 GMT
Schrauber - I have had that happen to me when I posted a picture and it brought me back to the same page... The second link isn't working for me either though  EDIT - it's working now. It was something to do with my Safari and Flash etc I like those brake hoods a lot! Where are they from? |
|
|
|
Post by schrauber on Apr 23, 2018 18:37:01 GMT
Glad the link works.
The brake handles I got complete from pereda-vintage.com in spain. The guy said he didn't have any separate hoods, just complete ones also some with calipers. The body of the handles are quite specific including the large top adjustment screw, so they might not fit anything else. He has a lot of interesting stuff.
Edit: the brake levers did cost 49 € plus slow postage.
|
|
|
|
Post by 54roadie on Apr 27, 2018 23:05:56 GMT
You made your own 48t porthole chainring? That's great! I've worked with professional machine shops that won't make gears, saying it requires special tooling to get the teeth located and spaced properly. Very nicely done. That should be a beautiful bike when finished.
Best regards,
Frank
|
|
|
|
Post by schrauber on Apr 29, 2018 16:16:10 GMT
Hi Frank, the chainring is still in the making. It's going ok so far, but there is some thinking and setting up to get through the next steps. I'll be proud to post pics it when it's done.
In the mean time I've been masking and spraying the frame which is also going going ok. Those curves for the headtube color detail are very tricky.
|
|
Jem
Viscount
?
Posts: 3,388
|
Post by Jem on Apr 29, 2018 19:25:10 GMT
Hi Frank, the chainring is still in the making. It's going ok so far, but there is some thinking and setting up to get through the next steps. I'll be proud to post pics it when it's done. In the mean time I've been masking and spraying the frame which is also going going ok. Those curves for the headtube color detail are very tricky. I'm going to tip my hat in respect for even attempting that! |
|
|
|
Post by schrauber on May 1, 2018 16:19:18 GMT
Latest update.
There are some more photos uploaded since I spent a lot of my spare time in the garage recently.
The bottle cage bosses worked out well, also preparing the frame which is now Sport red with Pro metallic black details. Waiting now for some hot & still weather to do the 2K clearcoat. And some other decals to arrive...
My biggest success is the next step on the chainring, also in the pics.
After profiling the thinned edge of the disc for the tooth cross section, and turning out the center 40mm hole it fitted onto the crank.
Next step, the teeth: I clamped a nos shimano 600/3 bolt 49T ring together with the disc, and used a router to cut the teeth. Somewhere I'd seen milling aluminium with router bits, so thought this was worth a go. I used a bigger 12mm bit first to take out the bulk of the metal, then the 6mm bit to follow the contours. I figured the chain rollers are bigger than that, so it should work ok. The end bearings are meant to be the same size as the cut, and looks close enough as the chain fits on fine.
So I now have the edgy 70's Shimano tooth profile in side view and section which is quite different to the TA/Viscount shape.
Well the router didn't complain at all about cutting the hard grade alum, but I was certainly covered in tinsel after that. Flakes of shiney alum everywhere.
So next steps are the mounting holes and portholes.
|
|
Jem
Viscount
?
Posts: 3,388
|
Post by Jem on May 1, 2018 16:43:21 GMT
Wow!!
Amazing photos...amazing work, well done
|
|
|
|
Post by schrauber on May 13, 2018 13:56:44 GMT
Well according to my last post, I was going to continue with the chainring holes. Well, the idea is there and it's mostly set up... In the mean time the frame has progressed a little with white edging of the black trim. Seems like just a little detail, but it took forever to mask up. I chose white after considering silver or pale gold. White, because in the end there is so much going on with these bikes (brake cables, clamps, and many shiney metal bits) so I thought the trimline had to strong and stand out together with the white logo and aerospace name. My fork could get me a stoning from purists I guess. However there is this thing about Lamberts/Viscounts that amazing things were started, but not continued through to the end! The smooth shapes of the Death fork, and alum Stem looked far ahead of their time. But these smooth lines were not matched to other parts, and the steel fork models missed out on any accent colour. So I took the chance to include the pointy lug lines. Use the same photobucket link as in first post. Next step is to fine wet sand the masked lines, to remove the edges and goop from the masking tapes, then comes the clear coat. Oh and perhaps some holes in the chain ring. Though that may have to wait till beg. June: after the corsica holiday  [yes with a different road bike] Cheers |
|
|
|
Post by 54roadie on May 16, 2018 19:31:24 GMT
That's beautiful, simply stunning. The chainring photos capture it nicely - that was a fine bit of work. I'm thinking the time and energy in just the ring must have been stupendous.
Let us all know when you're ready to start producing reproduction porthole chainrings...
Congratulations!
Frank
|
|
|
|
Post by schrauber on Jun 1, 2018 19:48:32 GMT
Hi Frank, and thanks,
well got back from corsica after seeming like 2 days and a night's travel. It's a great and wild place. With beautiful quiet & smooth roads, with healthy & fast gradients ...
I did kind of expect to get some inquisitive comments about chainrings: yes plural. And thought the only serious reply would be I don't have a cnc mill, as to muck about as I have done so far (as much as I do enjoy it) is not something I consider duplicating. If I change my mind, & find a more efficient way then I let you all know. Actually there are a number of people doing cnc custom/fancy rings, and this shape is really simple from a drawing point of view. Anyway I'm not interested in buying one, certainly more interested in getting the time to get this one finished.
|
|
|
|
Post by busaste on Jun 9, 2018 16:18:42 GMT
Wow!
This is a seriously good project full of proper engineering.
Can't wait for the next instalment.
Thanks
Steve
|
|
|
|
Post by schrauber on Jun 10, 2018 20:32:00 GMT
Well I'm not sure this is the installment you're waiting for, but it'll have to do Thanks for your comment (Steve), however I still consider the copy function of the router to make the tooth shape to be cheating of a high order! Clever yes, a bit of sideways thinking. Proper, well no... And I have managed to avoid the "botched in the shed" syndrome so far. - Wish me luck with the holes... I managed to get decals with smaller sized graphics for the TT & chainstays, after thinking the ones in the first lot were over sized. The guy was happy to supply them and wasn't aware that the frames came with the smaller (older?) and larger logos etc. Also got the 531 frame decals for another project, and couldn't resist a union jack for this one. Also from another guy I got the mirror silver logo shields, which are so much better than just the silver ones and much thinner(!!!). So mix & match. Next time would be different.. Spent ages getting the decals on straight and at the right positions on the tubes. Fun is that it is a one shot affair, and you only find out after peeling off all the masking tape and backing etc... There must be a less nerve racking way of doing this, and it's my 4th frame so I have some idea. Anyway all the colours and white graphics come together realy strongly, not sure if I want it to be so flashy though. The Clear coat is on too, with a few signs of impatience. Oh well, see if I can live with them. Probably not noticable on the finished bike, so I'll take note of the wife's eye rolling. The new photos are before the clear coat. It (this 2K clear) is amazingly shiney, like super wet. Looks like there's no way to avoid boring out the portholes and bolt holes for the next installment, even if it's after the Sella Ronda Bike day in 2 weeks. And yes I am trying to decide on the size of the inner (next job) chainring. I dont want to do a triple, but I get stuck deciding on a 36T or 38T. All road bikes I have, have 39T middle and it is so much better than the 34T of the compact cranks I took off.. cheers for now Steve |
|
|
|
Post by schrauber on Jul 6, 2018 11:38:50 GMT
Time to check in again. I have a new piece of Wedgewood to put in the 'Done' category. The 48T chainring is finished. Hooray, it worked. I escaped the 'botched in the shed' senario! Well although it has a few irregularities in the portholes, I'm proud of the result. My setup for the porthole boring was a bit wobbly with a too indirect mounting, and that hard grade aluminium likes to be cut properly. The hole spacing worked out perfectly with the rotary table, eventhough it's a nasty quality. Not that any of that matters on the finished part or bike to be. I uploaded the latest pics. HereNow I have done this chainring, I think I will take a further plunge and make a smaller one to match. For those going on the DFR, I wish you a great day. |
|
|
|
Post by dracco on Jul 6, 2018 12:47:54 GMT
I have a 50T/36T chainset on another bike, which is matched with a wide-range 5-speed Maillard freewheel(14-32), and I find that this gives me a very good set of gear ratios for the Yorkshire Dales (which have a lot of ups and downs - actually (it seems) principally ups), so I'd suggest that 36T would be a good size for your smaller chainring. Incidentally, when you're thinking about your sprockets, SJS cycles in Bristol distribute the IRD Classica range of freewheels that provide a good range of gearing options. I'm planning to incorporate something like this into my current Viscount project.
|
|
Jem
Viscount
?
Posts: 3,388
|
Post by Jem on Jul 7, 2018 6:04:47 GMT
Time to check in again. I have a new piece of Wedgewood to put in the 'Done' category. The 48T chainring is finished. Hooray, it worked. I escaped the 'botched in the shed' senario! Well although it has a few irregularities in the portholes, I'm proud of the result. My setup for the porthole boring was a bit wobbly with a too indirect mounting, and that hard grade aluminium likes to be cut properly. The hole spacing worked out perfectly with the rotary table, eventhough it's a nasty quality. Not that any of that matters on the finished part or bike to be. I uploaded the latest pics. HereNow I have done this chainring, I think I will take a further plunge and make a smaller one to match. For those going on the DFR, I wish you a great day. Schrauber- that is really something , well done, I am in awe of that kind of work. Looks like we are in for a hot day for the rally today! Will post some pics of it tonight or under #dfr6 on Twitter and Instagram |
|
|
|
Post by schrauber on Jul 8, 2018 19:29:03 GMT
I have a 50T/36T chainset on another bike, which is matched with a wide-range 5-speed Maillard freewheel(14-32), and I find that this gives me a very good set of gear ratios for the Yorkshire Dales (which have a lot of ups and downs - actually (it seems) principally ups), so I'd suggest that 36T would be a good size for your smaller chainring. Incidentally, when you're thinking about your sprockets, SJS cycles in Bristol distribute the IRD Classica range of freewheels that provide a good range of gearing options. I'm planning to incorporate something like this into my current Viscount project. Hi & thanks for the tip. They look both pricey and I guess of good quality. I have quite a few old 5 & 6 speed freewheels in good nick. I think first I'll try out the closer ratios of a 14-24 or 14-26. I remember taking off the original 14-32 skip tooth from my Sport cause I didn't use the 32 at all. Sure back then I was stronger and never heard my knees complain... I do still like the look of the skip tooth sprockets, I only ever saw them on Sports, but I did read in here somewhere that they do feel clunky to ride.. And I am tending towards doing the chainwheel in 36T, which I do have on another bike. It shouldn't be such a big decision as I doubt that I'll be gettting out on long steep hills with this one. >> Problem of too many good bikes<< |
|
robt
Viscount
Posts: 558
|
Post by robt on Jul 8, 2018 23:07:29 GMT
Looked at your pictures - just wow!
Great work, congratulations. I hope you can join us with your bike for DFR7 next year!
|
|
|
|
Post by schrauber on Jul 9, 2018 19:31:12 GMT
Looked at your pictures - just wow! Great work, congratulations. I hope you can join us with your bike for DFR7 next year! Hey thanks, I may be a bit weird but like making parts for bikes and also photographing them. Actually mostly the photos of the details are far more interesting than photos of whole bikes. I must get these up online one day, must be about 10 by now. And some are out to pasture. So the DFR7 will be in Germany next year ?? this could start a rumour... Well I should get around to spending some time over there, timing is not easy though. |
|
robt
Viscount
Posts: 558
|
Post by robt on Jul 9, 2018 20:11:40 GMT
Schrauber, you’re definitely not wierd in this company!
I took 12 detail photos of the Sachs-Maillard freewheel that I dismantled last week in order to access the tandem wheel spoke holes to rectify a pre-DFR6 spoke breakage.
(If anyone feels they need to know what the inside of a Sachs-Maillard freewheel looks like, let me know and I’ll post the pictures.)
|
|
|
|
Post by 54roadie on Jul 16, 2018 5:32:46 GMT
Schauber, your work is impeccable, sir. That is beautiful.
Enjoy the ride,
Frank
|
|
|
|
Post by oldroadietehachapi on Jul 23, 2018 8:56:29 GMT
I am oh so impressed, great work.
Cheers
Jim
|
|
|
|
Post by schrauber on Jul 23, 2018 20:18:10 GMT
There has been a bit of progress in the last weeks. After thinking I'd never do another chainwheel, I started today on the inner ring with porthole shape. Actually looks like a shimano on the drawing, but I hope it matches the 6 portholes. this one is easier, or I'm just less fearful. Also my Fork arrived and got polished for an hour or so plus a bit. Then a front hub. Still a box full of parts to go...
Also I put in the photo I reworked to check out the frame colours, stickers and black trim. The shot is awfully borrowed from the net, which was a lambert.
A few shots also made it into the start from my Koga Miyata which got my revived old viscount hubs.
Thanks for the compliments guys.
|
|
bendo
Viscount
Posts: 538
|
Post by bendo on Sept 25, 2018 13:15:08 GMT
Hi Schrauber
Thanks for your in-depth pics and description of your build. I keep going back and forth between your posts and your photobucket to check out different things. You're right that Viscounts were a bit inconsistent in their quality. But then there are things like the cleverly reinforced rear brake mounting hole that you noted. You sound very casual but you're getting amazing results! It's very inspiring.
Those drop-outs are indeed strange. I've never seen an eyelet like that recessed into the dropout itself, not even on a Viscount. And only drilled on one side! Well it has been mentioned before that they often threw bikes together with odds and ends from the parts-bin. I think yours is an example of that.
I'd love to hear your thoughts on when you finally ride it! b
|
|
|
|
Post by schrauber on Sept 30, 2018 20:40:01 GMT
Well a small update before it's October. I managed to finish the 36T inner chainring, took 2 half days more shed time. I needed to make a winter bike which consumed the last 4 weeks. A nice Stevens early 90's with brushed 'stainless looking' nickel plated frame. worked out well: guards, led lights & 2 x 8 speed shimano 90's LX in black. Routed the wiring inside the frame. Winter can come. @ bendo I have seen these dropouts in the net on viscounts, but not an odd pair like I have... I reckon there's still a long way to go before this one gets riden. so many details that I want to tinker with on this journey.. I have scored a Mk 3 fork here, but am becoming unsure if I want to use it now. On the UK cycling Forum, I got a member to post his photos of a broken mk3. Also I might be happier with painted forks I matched to the frame. Part of that is I'm considering to use my black DuraAce parts on this bike as well as the SR drops & seatpost, though this is getting still further away from original specs and design. Still guessing to have issues with caliper reach and will probably convert some new style cartridge pads to fit on the rather low walls of the weinmann rims. Then there's the brake lever reach and body angle that I want to improve ergonomicaly. Also I put in some kevlar reinforcment inside the chainstay where there was a rust hole. Just to be on the safe side. It's in the photos. So I made a new folder and page for the photos. so the new link should be: Aerospace ProHope it works. |
|
|
|
Post by cusqueno on Oct 1, 2018 13:31:25 GMT
Well a small update before it's October. I managed to finish the 36T inner chainring, took 2 half days more shed time. I needed to make a winter bike which consumed the last 4 weeks. A nice Stevens early 90's with brushed 'stainless looking' nickel plated frame. worked out well: guards, led lights & 2 x 8 speed shimano 90's LX in black. Routed the wiring inside the frame. Winter can come. So I made a new folder and page for the photos. so the new link should be: Aerospace ProHope it works. Lovely work. Good to see what can be done with skill and good machines! |
|
|
|
Post by schrauber on Nov 9, 2018 11:57:43 GMT
Checking in again, and again with a small update. There doesn't seem to be much fast progress these days. Annoyingly, there is a new photobucket version where I have loaded many photos, so my Aerospace Pro project has this new link
Means I think I have finished the crankset. Both 48 & 36T chainrings are done, and a set of long nuts to fit from the inside. The peddal threads were french (M14), so I tapped them out to BSA. (Buying french threaded cranks is a cheap way to get good classic cranks, and the tapping out is a breeze). The cranks, TA, buffed up easily. I have not yet checked the crank clearance for the FD cage, so some more tweeking could be needed. Let me know if the link doesn't work Cheers Steve 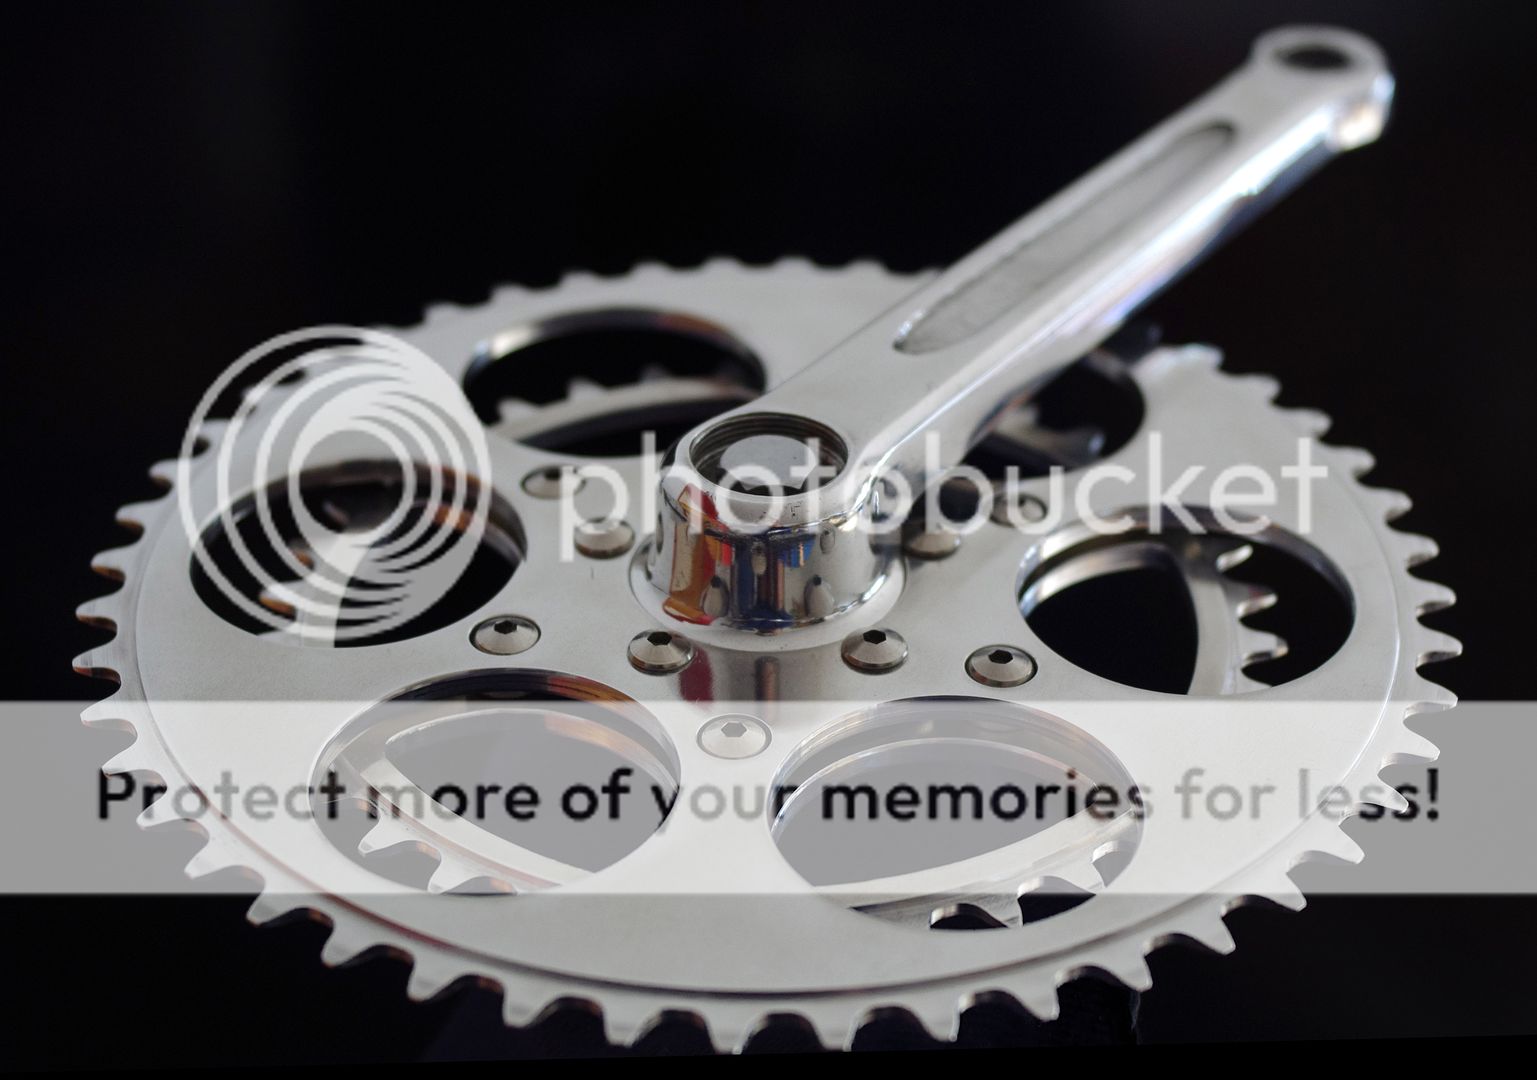 |
|
|
|
Post by schrauber on Feb 12, 2021 14:47:40 GMT
The bike made it up onto the wall, serving as a backdrop for my home office video sessions, and to make space.
It's not finished but getting close. Wheels got done with polished up VS hubs and Weinmann rims, black spokes. Crankset installed also a new tange headset and painted steel forks. Black Dura-ace bits. The painted forks work well with the frame and black DA stuff, and I'll swap out to the MK3 fork one day. Still to go are brake levers and bars which are my stumbling block.
I picked up a '96 GT LTS, so have been delving into disc brakes, suspension parts and servicing that stuff. Another winter project with making some parts.
My photobucket links still work, but I haven't been able to add any photos for ages. I just get many notifications what the great deals will cost...
|
|


 [yes with a different road bike]


